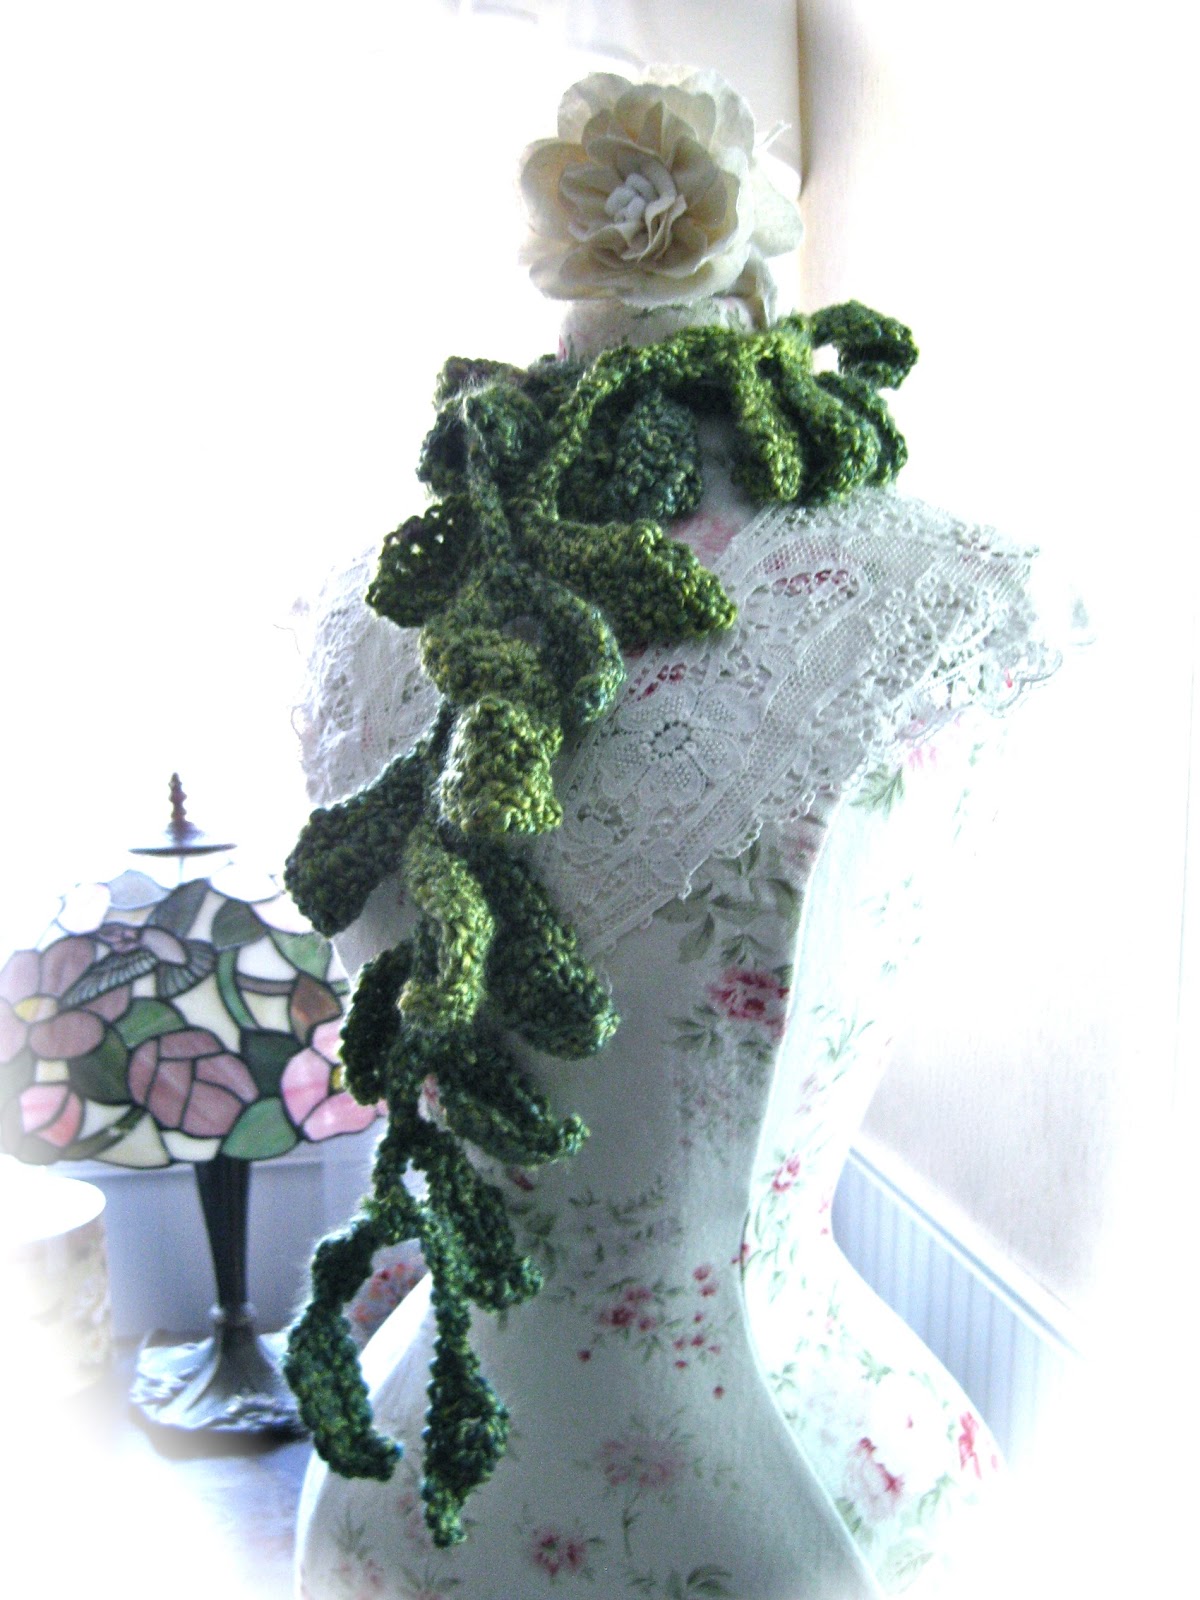
Showing posts with label crochet. Show all posts

Wednesday, September 3, 2014

This Old Backpack

I always put off back to school shopping until the last week.  It's not that I dread school starting, I just enjoy summer with the kids and it's hard to get into the "back to school" mentality until it's only a few days away.  We were so busy tracking down the right glue sticks and markers, I completely forgot that our rising second grader had a raggedy backpack!  

I like making things last as long as possible and I wasn't about to toss a perfectly okay (yet raggedy) backpack that could last another year (or two) if the side pockets hadn't turned into a shredded mess.   Oh, and by the way, I will think twice before purchasing a new backpack with that flimsy mesh junk again!  You're probably thinking I'm crazy for making such a big deal over side pockets, but I really like side pockets... and hydration!

So... the day before (yes, the day before) the first day of school, I ripped off what was left of the mesh and proceeded to crochet a pocket.  Basically, I made a cozy/cylinder using one of their water bottles and left an opening (where it attaches to the backpack)... so it was like a 3/4 cozy.  I started out with a circle for the base (single crochet), then worked the side back and forth in a half-double crochet/diamond stitch pattern.  Next, I found a large needle, some strong embroidery thread, and attached it to the backpack with a ton of stitches.  I left the blue elastic strap at the top to help secure the water bottle.  

I'm curious as to how well it will hold up throughout the year.  So far, in spite of looking a bit eccentric, it's working out well and her water stays cooler during these 95 degree school days.  The other side of the backpack looks basically like the first photo.  I only had time for one side and ... well... that's another day.  

Tuesday, May 20, 2014

Blanket Statement

I first learned to crochet when I was 12.  My mom would make those funky ("funky" in a good way) ripple afghans and they were remarkably cozy and practical.  I watched her and picked up on the double stitch ripple groove and made about 10 afghans one year.  Sadly, after compulsive coverlet creating, I kind of fizzled out and focused on smaller projects for the next few decades.

"Citrus Rose"
Several weeks ago, our younger daughter asked me to crochet a blanket for her.  I thought, "why not?" We looked over some ideas on Ravelry and we always love the beautiful designs and ideas from Lucy of Attic 24.  We went with the Granny Stripe Blanket.  After the initial 2 starting rows, which are mostly just long and a bit boring, the rest is a breeze!  There are so many options here.  You can go crazy with color or keep it refined.  You can crochet lengthwise or widthwise, depending on how you want your stripes to run.  I went with assorted colors from my cotton Sugar N' Cream stash, we call the finished product "Citrus Rose."  For the edging, I used a basic shell stitch.  

"Violet Bluebell"

Of course, our older daughter wanted one immediately after feeling the airy, yet cozy softness of the triple-crocheted granny stripe stitch. Since she loves blues, I went with a cooler-hued stash to create "Violet Bluebell."  I used a different edging here, I'm not sure what the appropriate name for it is.  Basically, I start with a shell stitch and add a picot stitch to the middle of the shell.  

These blankets are perfect for this time of year, especially when they are made of cotton yarn.  You could also use a double stitch as opposed to triple, to create a slightly tighter feel to the blanket.  Thicker, woolier yarn would also add warmth, if you need that.  


Wednesday, September 4, 2013

Strings and Stitches part II

See Strings and Stitches part I.
I still stink at sewing bodices that fit and using a sewing pattern is not my cup of tea.  However, I have discovered that I can CROCHET bodices much better than I can cut and sew!  This has taken my dressmaking skills to a whole new level of the Molly Weasley school of stitching!


I love these basic dresses for summer, especially to wear over top of a swimsuit.  They dry easily on a hot day!  You can even leave them out for winter with a turtleneck and some cute leggings.


I'm horrible at writing patterns, but honestly all you need to do is single stitch crochet and keep a child nearby for measuring.  I use cotton yarn, so I make sure it's a little snug because it will stretch some with wear.  If you need a pattern, I looked up a few for you on Ravelry...
Beautiful Red Dress
Kindergarten Dress
How to Crochet a Child's Dress

Along the bottom of the bodice, I usually do a small shell stitch and along the top and the sides of the straps, popcorn stitches.  Most popcorn patterns call for 5 double crochet stitches, but I make a more petite edging for these by using 4 half double crochet stitches.

I have actually washed these and they held up, but remember cotton yarn is going to fade a little.  If you are going for rich, bold colors, you may want to look for another fiber.

Spending less time worrying about the exact cut and stitching of the bodice allows me to be more creative and experiment with the skirt (see "hobbit dress" below).  I actually used wool yarn for this bodice because I knew it would be worn over top of a blouse in October.   After this photo was taken, I took the straps up a bit because, well... they needed it.

I did not make the bunny (lamb) costume!

Notice the "furry" hobbit feet!


Of course, crochet works beautifully with tulle!  

 For very basic and amateur instructions, see How To Make a Butterfly Fairy Dress.

Monday, September 2, 2013

Gothic Horror

 Something wicked this way comes...
Scarlet Grove print with quote

Sleepy Hollow stemless wine glasses


Ichabod ornament

Sleepy Hollow print


Crimson scarf
Edgar pilsner glasses


These can be unearthed in my Etsy shop.

Wednesday, January 9, 2013

Truly Handmade With Love

Recently, I crocheted a bunch of snowflakes with hopes of sending them to the Sandy Hook PTA for the "Snowflakes for Sandy Hook" project.  When I visited their website to get the address, I was slightly disappointed to see that they no longer needed snowflakes, as they had enough snowflake donations to cover the entire town!  But I couldn't stay disappointed for more than a few seconds... it made me smile to think of all the snowflakes that were created with so much love!

By the way, if you happen to need a crochet pattern for snowflakes, ChezCrochet is a good source.  I soaked these in a glue/water solution with a bit of fine, powdery white glitter, to make them stiff and slightly shimmery.

I am not always great with words (and blogging), especially when it involves such a profound situation.  The snowflakes were a chance for me to say... in a befuddled way... I would crochet a thousand of these if it could change what happened, but for now I will crochet as many as I can to let someone know I care.

The United Way of Western Connecticut Response for Newtown/Sandy Hook is accepting donations to provide support to the community.   I will either donate these snowflakes to our local school if they need them or auction them on eBay and have the money go directly to the United Way branch listed above.  I have other listings on eBay donating to this charity, along with a section in my Etsy shop.


Friday, November 2, 2012

How to Make a Butterfly Fairy Dress!

Here are some slaphappy instructions for making this dress.  If you have very basic crochet and sewing skills, you can master this.

First of all, you need to be able to crochet a basic fish net stitch.  You will need some worsted weight YARN -- I used Lily Sugar'n Cream. You do not need anything fancy and it will not take a lot of yarn for this stitch.  Use something fairly durable, soft and silky isn't the way to go here.

You will also need TULLE (I prefer spools) in colors of your choice.  The amount you need depends upon how full you want the skirt.  I used about 3 spools here (7 on the blue dress below).

Other things you need...
-- a crochet needle (I used size I or 5.50 mm)
-- an embroidery needle
-- sturdy thread to match your bodice
-- a cotton, stretchy camisole to match the bodice
-- sharp scissors, fabric scissors if you have them
-- ribbon for decoration

Use the child or a dress form to determine the size you need for your foundation row (it needs to be snug).  I prefer joining the bodice in the end since I'm going to be adding tulle and stitching it to a camisole.

Fish net back and forth until the bodice is the right length to fit the child.  PLEASE NOTE:  This stitch will stretch a lot once the tulle is added.  If you are adding a lot of tulle it could double in length, so be careful not to make the bodice too long.  For this particular dress the bodice has 14 rows, but it all depends on the yarn and the size you need.

Be sure to secure the stitch when you finish.  I always add another string of yarn into the last stitch to tie everything together, just to be safe.  Simply weaving in the ends is not going to be enough for such an airy stitch.

Your bodice should be a big rectangle.  You may have noticed by now that I do not normally write patterns or instructions (and that is probably for the best).

Now for the fun part... adding the tulle!  You can be as sloppy or as precise as you like here.  I like to use the spools of tulle, it's a lot easier for measuring and cutting.  Just roll out the spool, cut with some sharp fabric scissors,  and remember, you are going to need each strand to be TWICE the desired length.

If you are planning for the skirt to actually function as a skirt (no leggings needed), you will need a lot of tulle.  I still recommend using a little slip or tights underneath.  For the butterfly dress, we were planning to use leggings so I added just enough tulle to make it full and fancy.

As for colors, be creative!  My daughter wanted to be a monarch butterfly, so I used (in descending order of quantity) orange, black, yellow, and fuchsia.

After you have your strips of tulle ready, you can simply pull the strands through the openings in the bottom of the bodice.  When a strip is halfway through the opening, tie it into a double knot to secure it.  You can make the skirt as full as you like, but remember, the more tulle you add, the more your bodice is going to stretch.  For this dress I used two strips of tulle in each opening along the bottom, and at least one strip in each opening in the next row above.  For the blue/purple dress to the left, I used almost twice as much tulle, and the the yarn in the bodice was almost too soft and stretchy for that.  Again, just use a fairly stiff yarn if you want to use a lot of tulle.  Even that scratchy Red Heart Super Saver stuff works well for this.

Now you have a fish net rectangle with a lot of tulle hanging from it!  Let's make it functional by finding a matching camisole.  I like the cotton camisoles at Target, especially the ones with the soft lacy trim.  Any cotton, stretchy camisole will do as long as the color is right and matches your bodice.  I was lucky enough to find blue ones at Target this summer to match the blue flower girl dress.  Finding a black camisole was easy.  Make sure the camisole has a snug fit!

Go find a needle and some matching thread.  I suppose you could use a sewing machine for this but I felt more comfortable doing this by hand.  Position the bodice over the camisole so the ends meet directly at the back center (or as close as possible).  Sew the bodice to the camisole along the top.  Use lots of stitches and secure them well.  I am neither a a sewing expert nor a sewing instructor so I wish you the best of luck here!  Just make sure you use plenty of stitches, sturdy thread, and if the thread is a good match, all those crooked stitches wrapped around the yarn will not be noticeable.  When you are finished, the bodice should be securely attached to the camisole and the opening should be at (or near) the back center of the camisole.

Now it is time to stitch the camisole together with your matching yarn.  I like to use slip stitches then go back and tie with several pieces of yarn.  If you feel like the closing looks messy, take some pretty ribbon and tie some bows back there for distraction.  I am a lace/ribbon/bow/trim hoarder, mainly because I am impatient and I like distractions.

You're almost finished!  Decorate it however you like -- I added lots of ribbon to the monarch butterfly dress.  For the flower girl dress, I attempted to make my own silk flowers.  I made enough for two dresses and I burned myself a few times.  Just be careful if you do this and there are tons of tutorials out there for making these.  Of course, you could just buy some silk flowers or (even better if you have the time) find some at a local Goodwill store, flea market, etc.

It was fairly cold this Halloween (yay!) so we used a plain black stretchy shirt underneath, plain black leggings, black socks, and ideally black shoes (but my daughter wanted to wear pink sparkly shoes... it worked).  I decorated her black leggings with strips of tulle (see photo, this was a 30-second decoration) and painted her face a little, which she loved.

I was going to attempt to make the wings, but after having a sinus infection all week I broke over the day before and purchased wings at the some big Halloween chain store.  By the way, those stores are not child friendly in my opinion.  Why should my kids have to see a plastic yard scene from SAW or disfigured zombie babies when they walk in the door?  Lesson learned.

Believe it or not, it took us twice as long to come up with the "sweet, cute, friendly werewolf" outfit for  our older daughter.  I can only take credit for the disheveled furry "leg cuffs" and that thing hanging on her arm.  Oh, I smeared some blackish grey paint on her face.  Fortunately my husband found a mask at a local costume rental shop, as the chain stores only had scary, mean grizzly werewolves (and no "normal" wolves whatsoever) with severed arms hanging from their jaws.

USEFUL ADVICE
-- Help your little one get into and out of this dress!  It is made to fit snug, there are tons of holes in that bodice for little arms to force their way through, and you do not want a struggling child caught in this mound of fish net and tulle!  A strong, angry child could possibly destroy this dress in a fraction of the time it took you to make it.

-- This is not an easy care, wash and wear type of dress.  Wash it by hand if needed and lay flat to dry (be sure to shape it properly).  It's fine for play as long as they aren't bouncing off of the walls.   With that said, how durable are those cheaply made costumes at Target or Wal Mart?  I can assure you that this dress, if made properly, will not only be more durable but 10 times more beautiful than anything (affordable) you will find at a chain store.

-- Do not attempt to sell your creations unless you have made quite a few and tested their durability on actual children!   So far, the dresses I have made have not fallen apart after a few outings, but I am still not to the point where I would personally want to sell these.

-- Feel free to experiment!  If you want a more durable bodice and you have the time, single crochet all the way around.  For the last 2-3 rows, double crochet to give yourself openings for tulle.  You could even create a bodice with straps or sleeves that will not need an attached camisole.  I personally like the fish net design, not only because it's quick to create, but it has lots of decorating options.  Furthermore, if I am going to devote the time and effort to crocheting a solid, functional sweater,  I am probably going to let it remain... a sweater.


Thursday, September 6, 2012

Cozy Crochet

Virginia is a beautiful state, but there are quite a few weeks in the summer that are downright miserable.  When the heat index is 107 and the only creature stirring outside is a hungry mosquito, the last thing one would normally think about is wooly scarves!   Crocheting is actually quite accommodating for indoor, air-conditioned days when the kids are stuck inside reading, practicing their instruments, and ...well... watching way too much My Little Pony (friendship IS magic, by the way).

It was a very long, hot summer!

These scarves are in my Etsy shop.


Of course I had to make a "Rainbow Sash!"


Tuesday, January 17, 2012

Crochet Persuasion

It's not often that I purchase an entire book of crochet patterns... NEW!  Usually I look for crochet books at used book stores or the library, or I purchase individual patterns from Etsy.  Well... USUALLY I look for free patterns, but I seldom hesitate to purchase a pattern if it looks well-written.

I found this book on Amazon today, Austentatious Crochet:  36 Contemporary Designs from the world of Jane Austen by Melissa Horozewski.  My first project will be the "Eat Your Heart Out Willoughby" sweater!


"Eat Your Heart Out Willoughby" sweater
"Becoming Jane" sweater - free pattern here!


The "Becoming Jane" sweater (the green one) is also quite beautiful and it happens to be available for FREE on this blog.

Jane Bennet skirt
"A Ball at Netherfield" sweater


Pin It

Sunday, September 25, 2011

Woodland Cardigan

 My latest crochet project was larger than my usual scarf or bracelet but great fun!  I purchased a pattern for this beautiful cardigan, "The Ermeline Cardigan" from the Etsy shop of the very talented SylvChezPlum .  Of course I always like to add my own twist, but I was able to do so because of the clarity and design of this pattern.  Included in a 23-page e-book with beautiful images and 3 other patterns, this tutorial was worth every penny!  I wanted to add an appliqué to give it a "woodland" theme and I found the most gorgeous appliqué patterns at the Etsy shop of ch1306 .  I used slightly larger needles and yarn to make it usable as a pocket.


photo from ch1306's shop
There are tons of free patterns online for various projects, but I have found over the past few years that in most cases it is worth it to purchase a pattern, usually in the form of an e-book tutorial.  I have quite a few unfinished projects that started out as hopeful sweaters or potential dresses, but after struggling with a pattern that was incomplete or just completely vague, they became spare parts.  Of course, there are many patterns out there that are free and wonderful, but if I want to create something that could be tricky or time-consuming I usually look for reputable sources on Etsy or Ravelry.  There is an art to designing and writing a good pattern and I believe in supporting artists!

photo from SylvChezPlum's shop
SylvChezPlum's tutorial made the entire project enjoyable and I like how she created the layout of the cardigan.  As you can see from the image from her shop (right), her design is more polished.  I tend to add some whimsical elements to my work, mostly to pull the focus toward the slightly absurd and hopefully disguise the fact that my work is often a bit amateur and messy!  She also uses gorgeous, high quality yarn.  As I become more comfortable with this project I will probably move up to better quality yarn.  The kids are already asking for this is in several colors and pretty soon they will both have a brown one just like the one I finished.  Fortunately it is still quite warm so they are not fighting over this one yet!

I added a flower to the end of the hood to disguise a frayed end, made the sleeves flared (just because I love the look), and of course, added that lovely appliqué.  As I was stitching the appliqué to the cardigan, I left the top open to use as a little pocket for various treasures.   I also made the cardigan slightly longer and flared at the bottom.

Needless to say, both SylvChezPlum and ch1306 are on my list of favorite Etsy shops and I will be purchasing more from them.  It's so nice to have finished projects!

Saturday, August 13, 2011

Crochet Disarray

I love crocheting... sometimes.  I go through creative waves, sometimes I want to do nothing but paint, sometimes nothing but compose music, sometimes I fixate on making pretty trinkets, and for those times when I can sit still I like to crochet.  While most of my finished projects consist of cute little bracelets for the kids, several hats and cloches, leg warmers, hair bands, etc., I have an impressive selection of unfinished projects!  Actually, "embarrassing" is the better word -- there are half-sweaters, disembodied sleeves, almost finished hoods that turned out large enough for a giant troll, and lots of unidentifiable strips and squares.  Regardless of this questionable clutter and bags of hoarded yarn, I find crochet to be a healthy, enjoyable activity that is usually compatible with short bursts of "free time" between kids, housework, and business-related activities.
e-book pattern from Lullaby Lamb
this pattern is FREE on Ravelry
another free pattern


My kids love it when I crochet;  however, the frustration sets in when they want to crochet too!  Considering they are only 4 and 5, teaching them to crochet is pretty much impossible at this point and they have a hard time accepting this.  I try to assure them that when they are old enough (a crochet/knitting goddess told me 8 years old is a good time to start) I will be ecstatic to teach them!  While I love the ages they are now, I look forward to being able to spend time with them crocheting and making cool things.  My mom taught me how to crochet when I was... I think 12 (or slightly earlier).  One year I made about 20 afghans (the basic, groovy "wave" pattern) to give away as Christmas gifts!  

free pattern on Ravelry
felted bag by galafilc on Etsy
Clearly, the most rewarding and useful accessories I have made are legwarmers, scarves, hats, and the little bracelets and headbands that take about 10 minutes to make!   I made a little red sweater a couple of years ago and while it was not a difficult project, it was time-consuming and the outcome was a very heavy, bulky, crooked (the hood part) sweater that my daughter insisted on wearing when it was 80 degrees in her preschool building!  I eventually hid the sweater and vowed never to use such heavy yarn with a single-stitch project.  Then there was Mr. and Mrs. Fox.  They are very cute and the kids love them, but sewing all the parts together was frustrating because I never felt like everything was connected securely.  Another frustration with making kids' accessories, clothing, and toys is... the fraying.  Little legwarmers come home all fuzzy at the bottom and I cringe when I see them take a scarf off and drop it on the ground.  One of these days I am going to try felting!  Felted projects are not only gorgeous, they look more durable.  Of course, I don't think felted legwarmers are a good idea.  But how gorgeous is this felted bag (above) from galafilc on Etsy?!?  

Sometimes I catch myself up at 2 AM browsing Etsy or Ravelry for crochet patterns.  The other night/morning, I found a treasure trove of vintage patterns (mostly from the 70s) from wonkyzebra on Etsy (who is super nice, btw) and while I am usually not a fan of 70s fashion, these patterns are gorgeous and can be modified into something more modern and/or practical!  I purchased about 5 patterns, including the one pictured here in sage green.  I know, the dress, the pool, the shoes... how could I?  I'm thinking this would be beautiful in black or a deep, garnet red with a different neckline... perhaps a jewel neckline with picot edging and lose the buttons.  Make the wide sleeves slimmer while attempting to salvage a smaller version of the design around the cuff and lose just a tiny bit of fullness in the skirt (and/or make it shorter).  OR... you could create a lovely Victorian look using cream or grey yarn, keep the same collar with buttons, make the sleeves very slim and fitting with a slight flare at the cuff, and make the skirt a bit longer and less full.  This Victorian version would also look beautiful in black, although a bit more goth (I tend to tread delicately between the line of Victorian and goth).  

I also purchased this tunic dress pattern, which needs little or no modification!  It's wonderful and you could even make a sleeveless version!  Obviously it would be easy to modify the length of the sleeves and/or the dress if needed.  A shorter version would make a pretty tunic to wear with tights or leggings.  

Now that I have all of these cool projects and lots of yarn, I should make something.  For every finished project, there are probably 2 unfinished projects, 20 extra skeins of yarn, and 200 ideas!